In Received Digital, workflows determine how you receive and store items, as well as how the Location ID is formulated for those items. In one particular case, the workflow even has an effect on which actions are available to recipients.
As you can tell, workflows are integral to the way the mailroom operates, and selecting the one that best fits your environment is critical. Here is an in-depth look at each workflow available for both mail and packages.
Workflows for mail
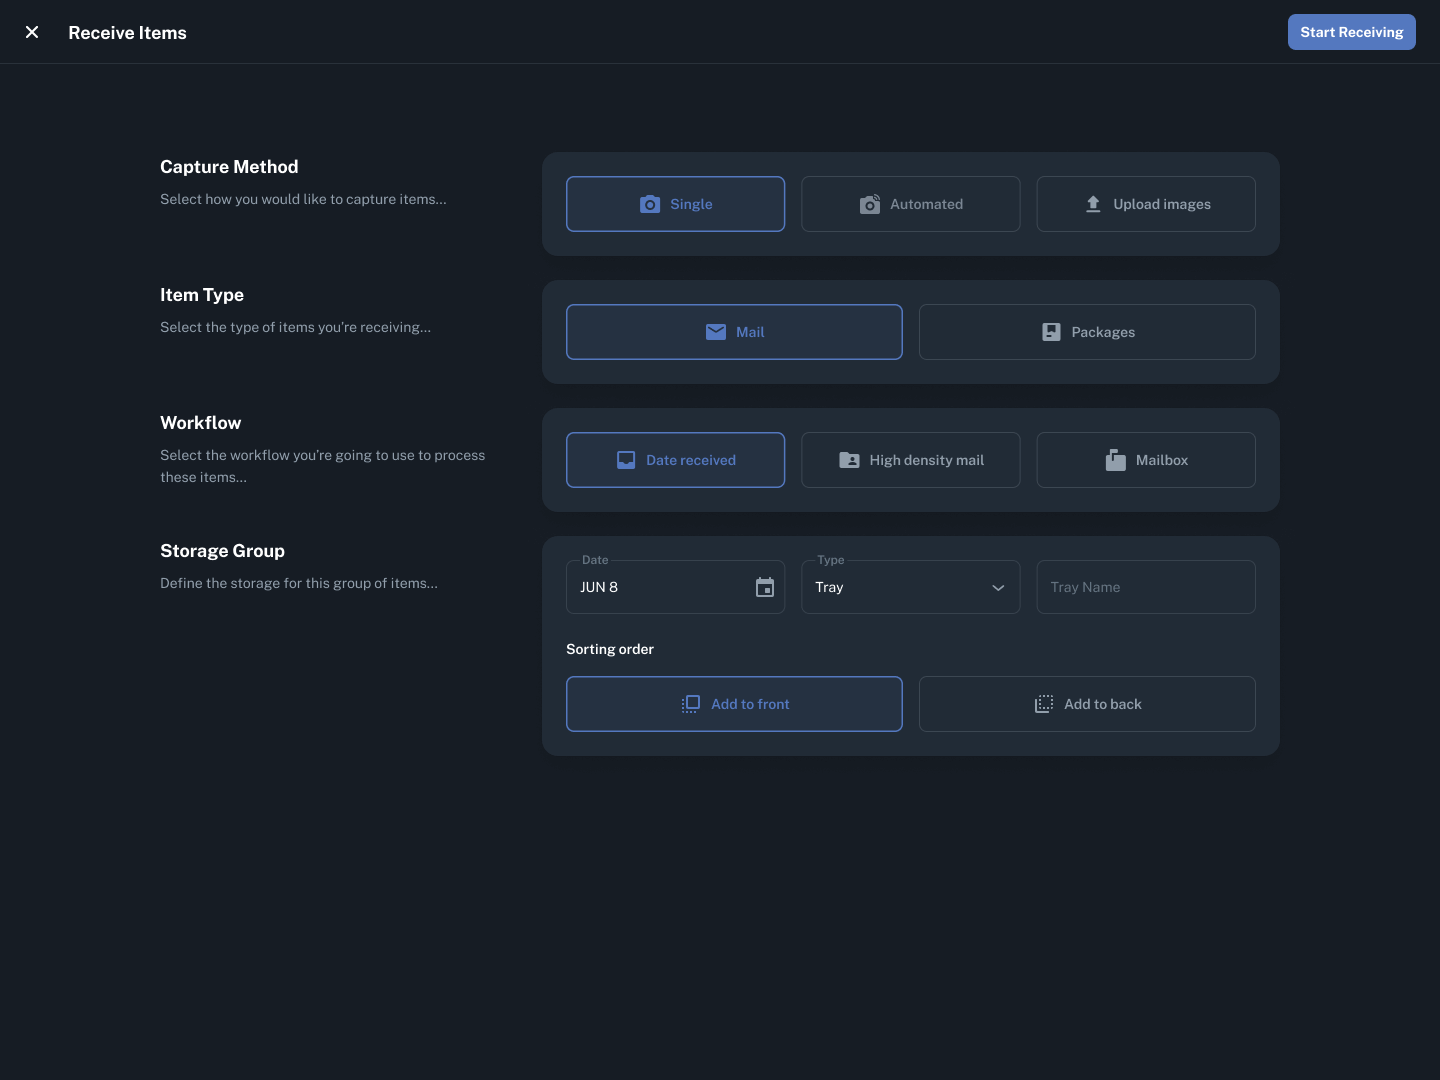
Date received
With the date received workflow, mail is put into containers, such as trays, folders, bundles, or boxes, as it is received each day. Thus, mail ends up being sorted by the date it was received.
When the date received workflow is selected, you’ll have the opportunity to configure a few settings related to the storage group before you start receiving. Specifically, you’ll be able to select a Type (tray, folder, bundle, or box), change the date (in case you’re receiving mail that was delivered on a prior date), and enter a name for the container. Giving the container a name is helpful when distinguishing between multiple containers of the same type from the same day.
You’ll also have the ability to select a sorting order for your container. The sorting order determines how new envelopes will be added to your container. New envelopes can either be added to the front or back of your container. Whichever you choose, it is crucial that you follow this rule as you receive items so the Location ID assigned to each item is accurate.
When mail is received with the date received workflow, the Location ID for any given envelope will look something like this:
JUN 8 – Tray (1)
In this example, the date is June 8th, Tray was selected as the Type, and the tray was given the name “A.” The spot number in parentheses indicates the item’s place in the container.
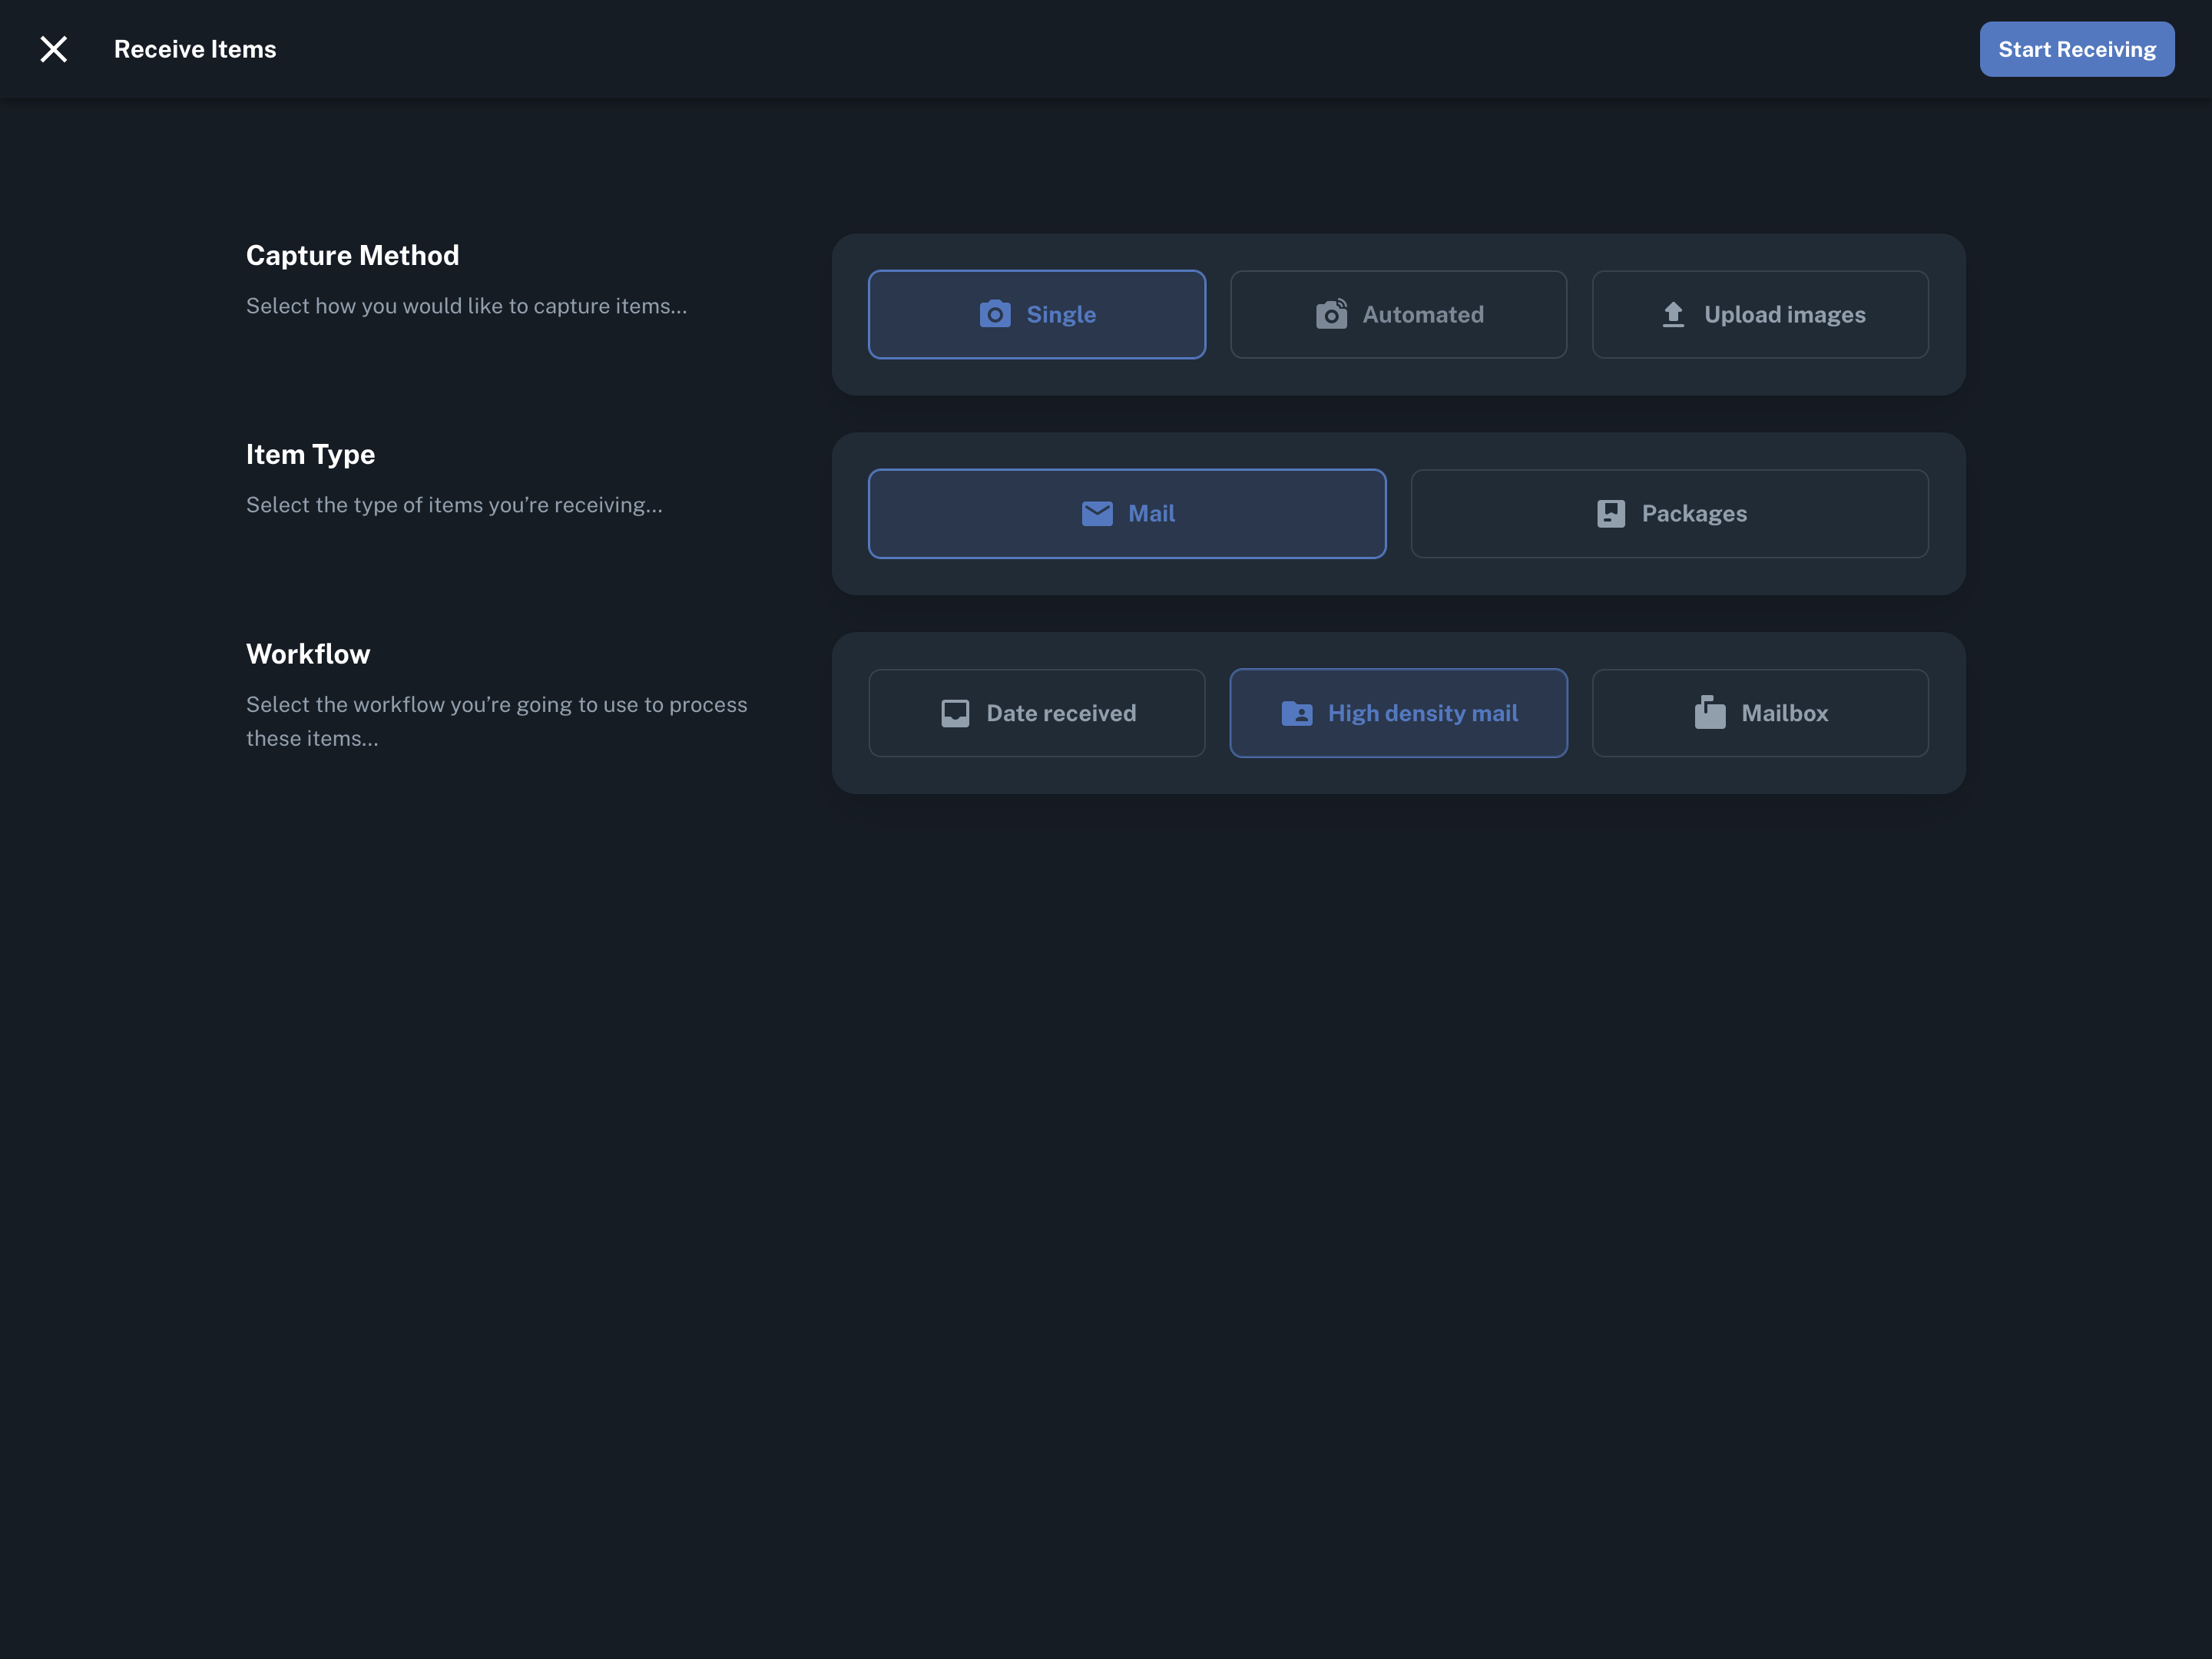
High density mail
With the high density mail workflow, each recipient has a dedicated folder that their mail is sorted into as it’s received.
When the high density mail workflow is selected, no further configuration of the storage group is necessary, so that option does not appear.
When mail is received with the high density mail workflow, the Location ID for any given envelope will look something like this:
HDM – Debra Baker (1)
“HDM” refers to high density mail. By default, the recipient’s full name will appear after the dash, but this can be changed to show the User ID instead if that is preferred. The spot number in parentheses indicates the item’s place in the recipient’s folder.
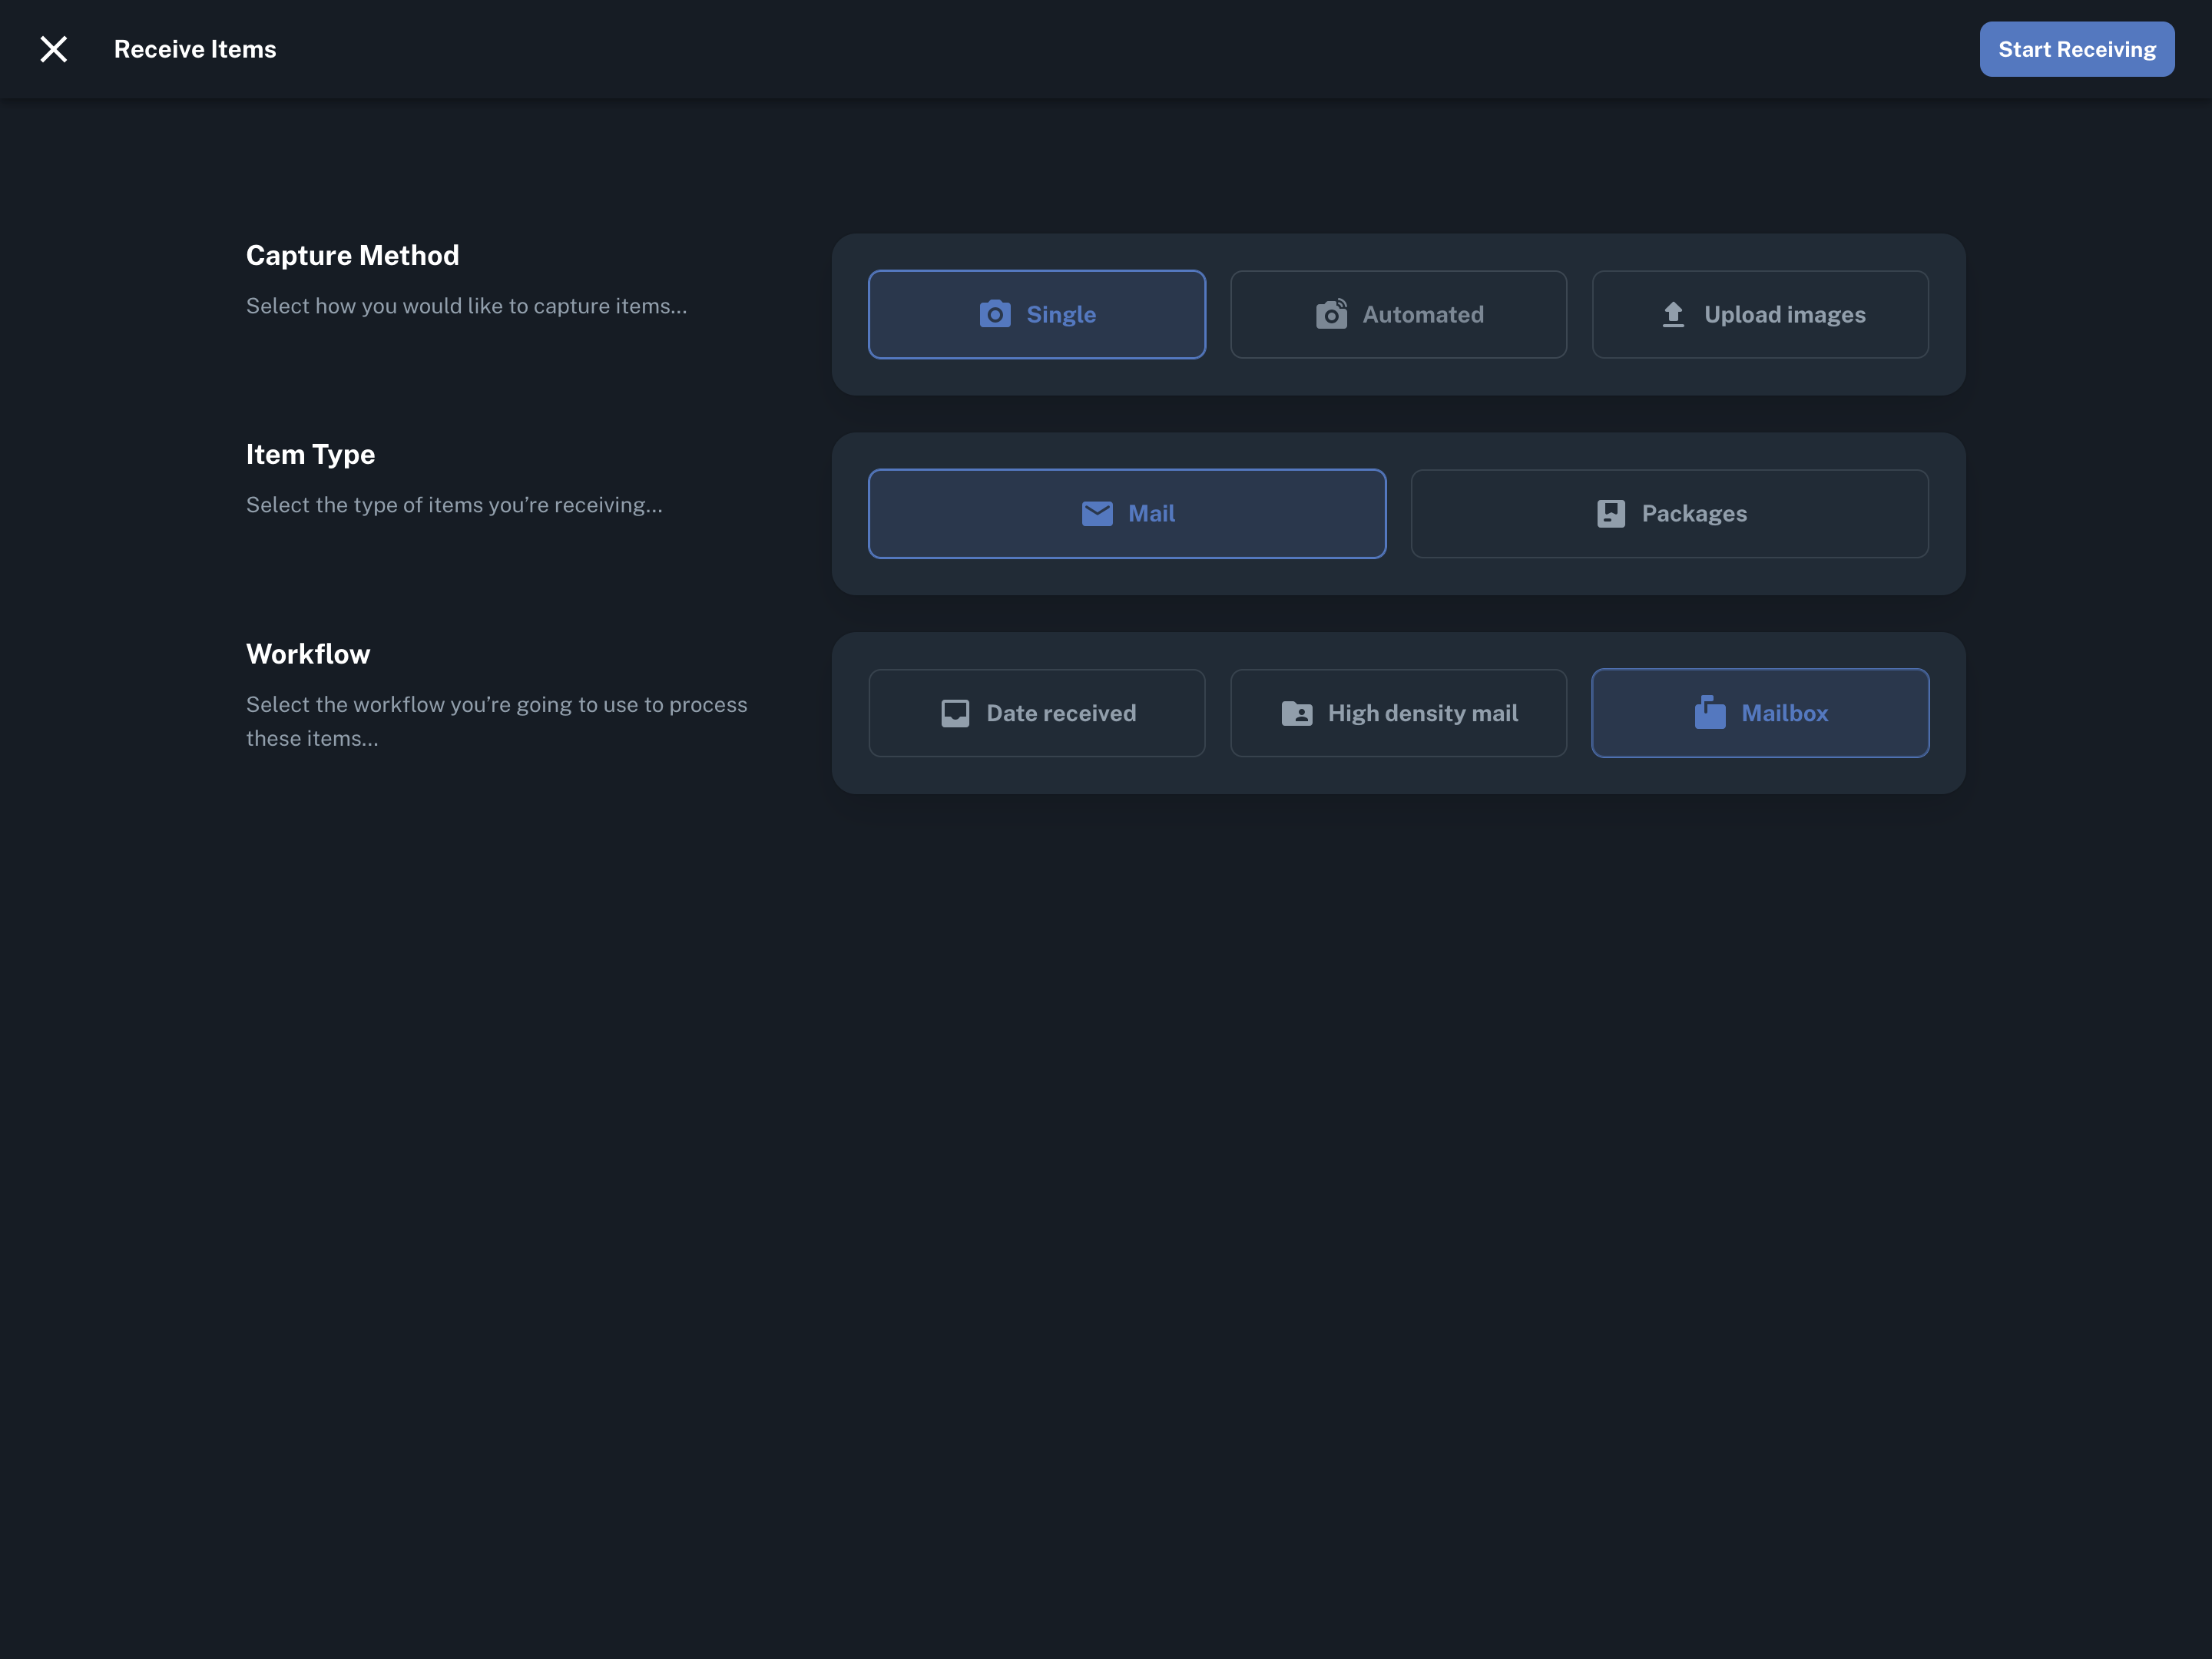
Mailbox
With the mailbox workflow, each recipient has a dedicated mailbox that their mail is sorted into as it’s received. The mailbox workflow is unique in that it assumes recipients will pick up their mail from their mailbox on their own. Therefore, recipients are not required to action their mail. Instead, they will always have the ability to archive mail pieces to move them out of the New section of their inbox.
When the mailbox workflow is selected, no further configuration of the storage group is necessary, so that option does not appear.
When mail is received with the mailbox workflow, the Location ID for any given envelope will look something like this:
Mailbox – Debra Baker (1)
“Mailbox” indicates the item was received with the mailbox workflow. By default, the recipient’s full name will appear after the dash, but this can be changed to show the User ID instead if that is preferred. The spot number in parentheses indicates the item’s place in the recipient’s mailbox.
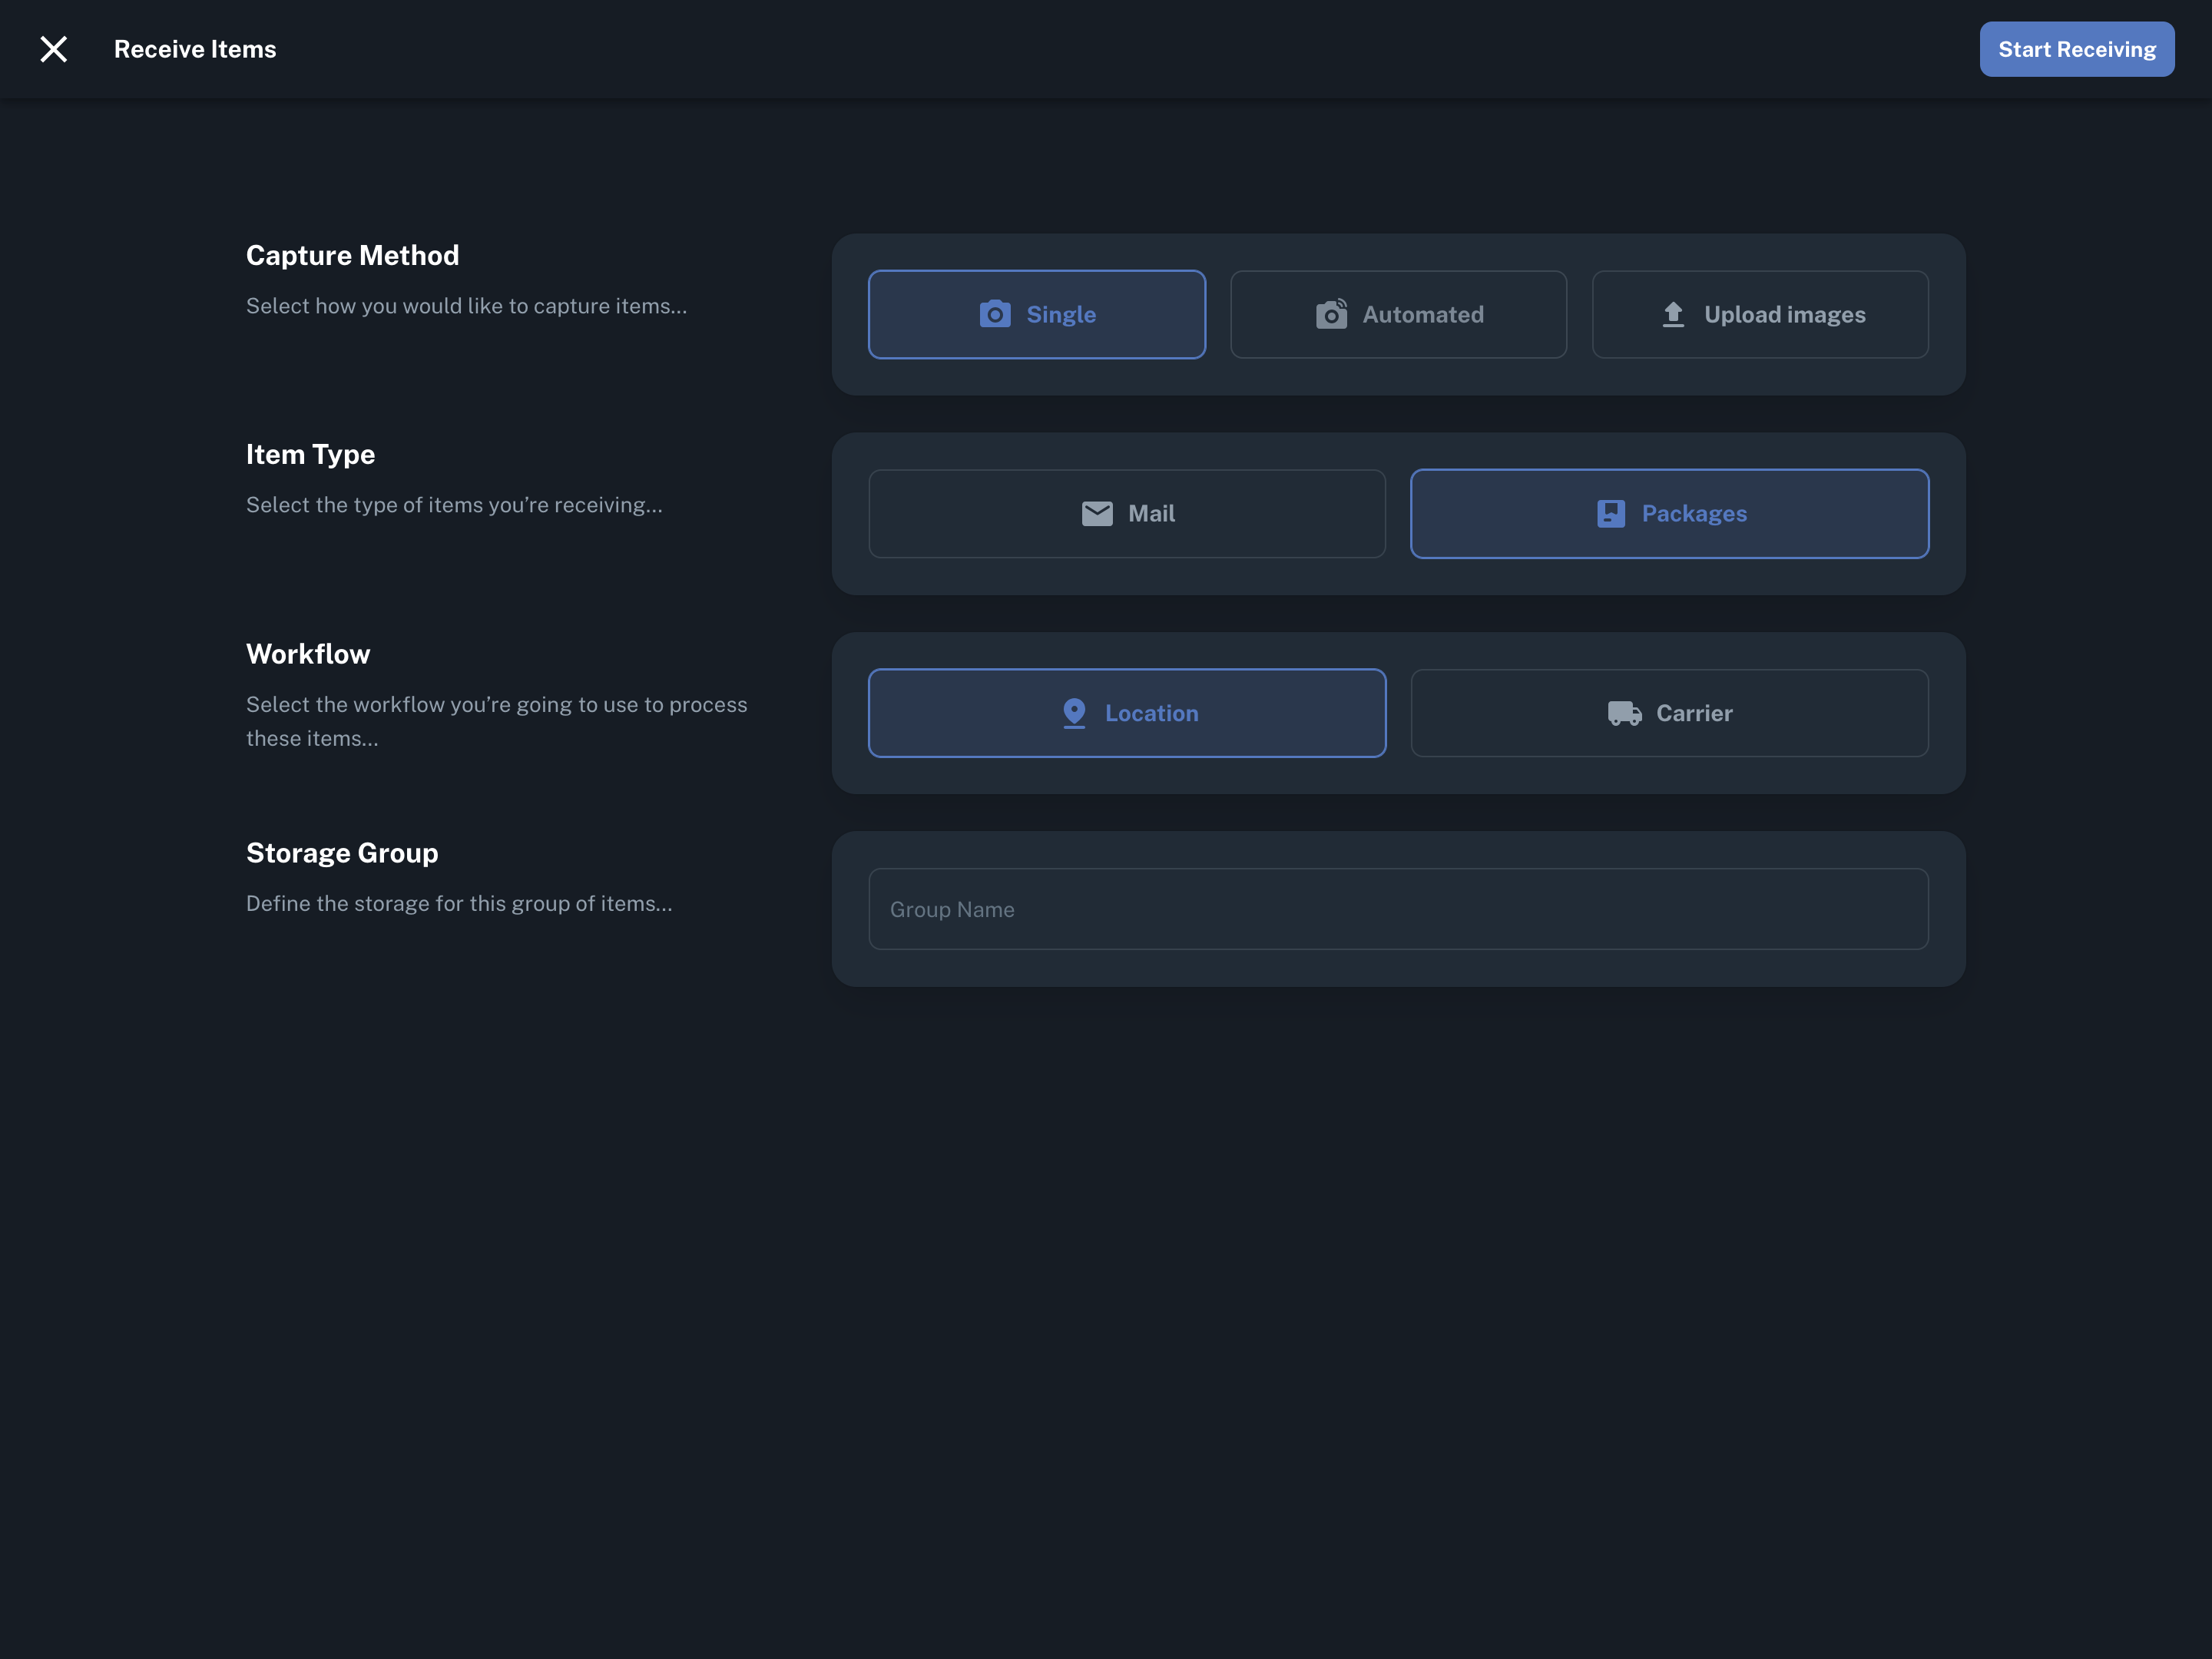
Workflows for packages
Location
With the location workflow, you have the ability to organize packages in your mailroom however you’d like and reflect their exact storage location in Received Digital. Specifically, packages can be organized into groups and assigned spots within those groups, though neither are required.
When the location workflow is selected, you’ll have the option to enter a group name for the packages before you start receiving. This is generally a name for the building, room, or shelf where the packages are being stored.
As you’re receiving packages, you’ll have the option to enter a value for the exact spot the package is located. When packages are received with the location workflow, the Location ID for any given package will look something like this:
Location – Shelf A (1)
“Location” indicates the package was received with the location workflow. In this example, “Shelf A” was entered as the Group Name, and “1” was entered as the Spot, meaning this package is being stored in spot 1 on shelf A.
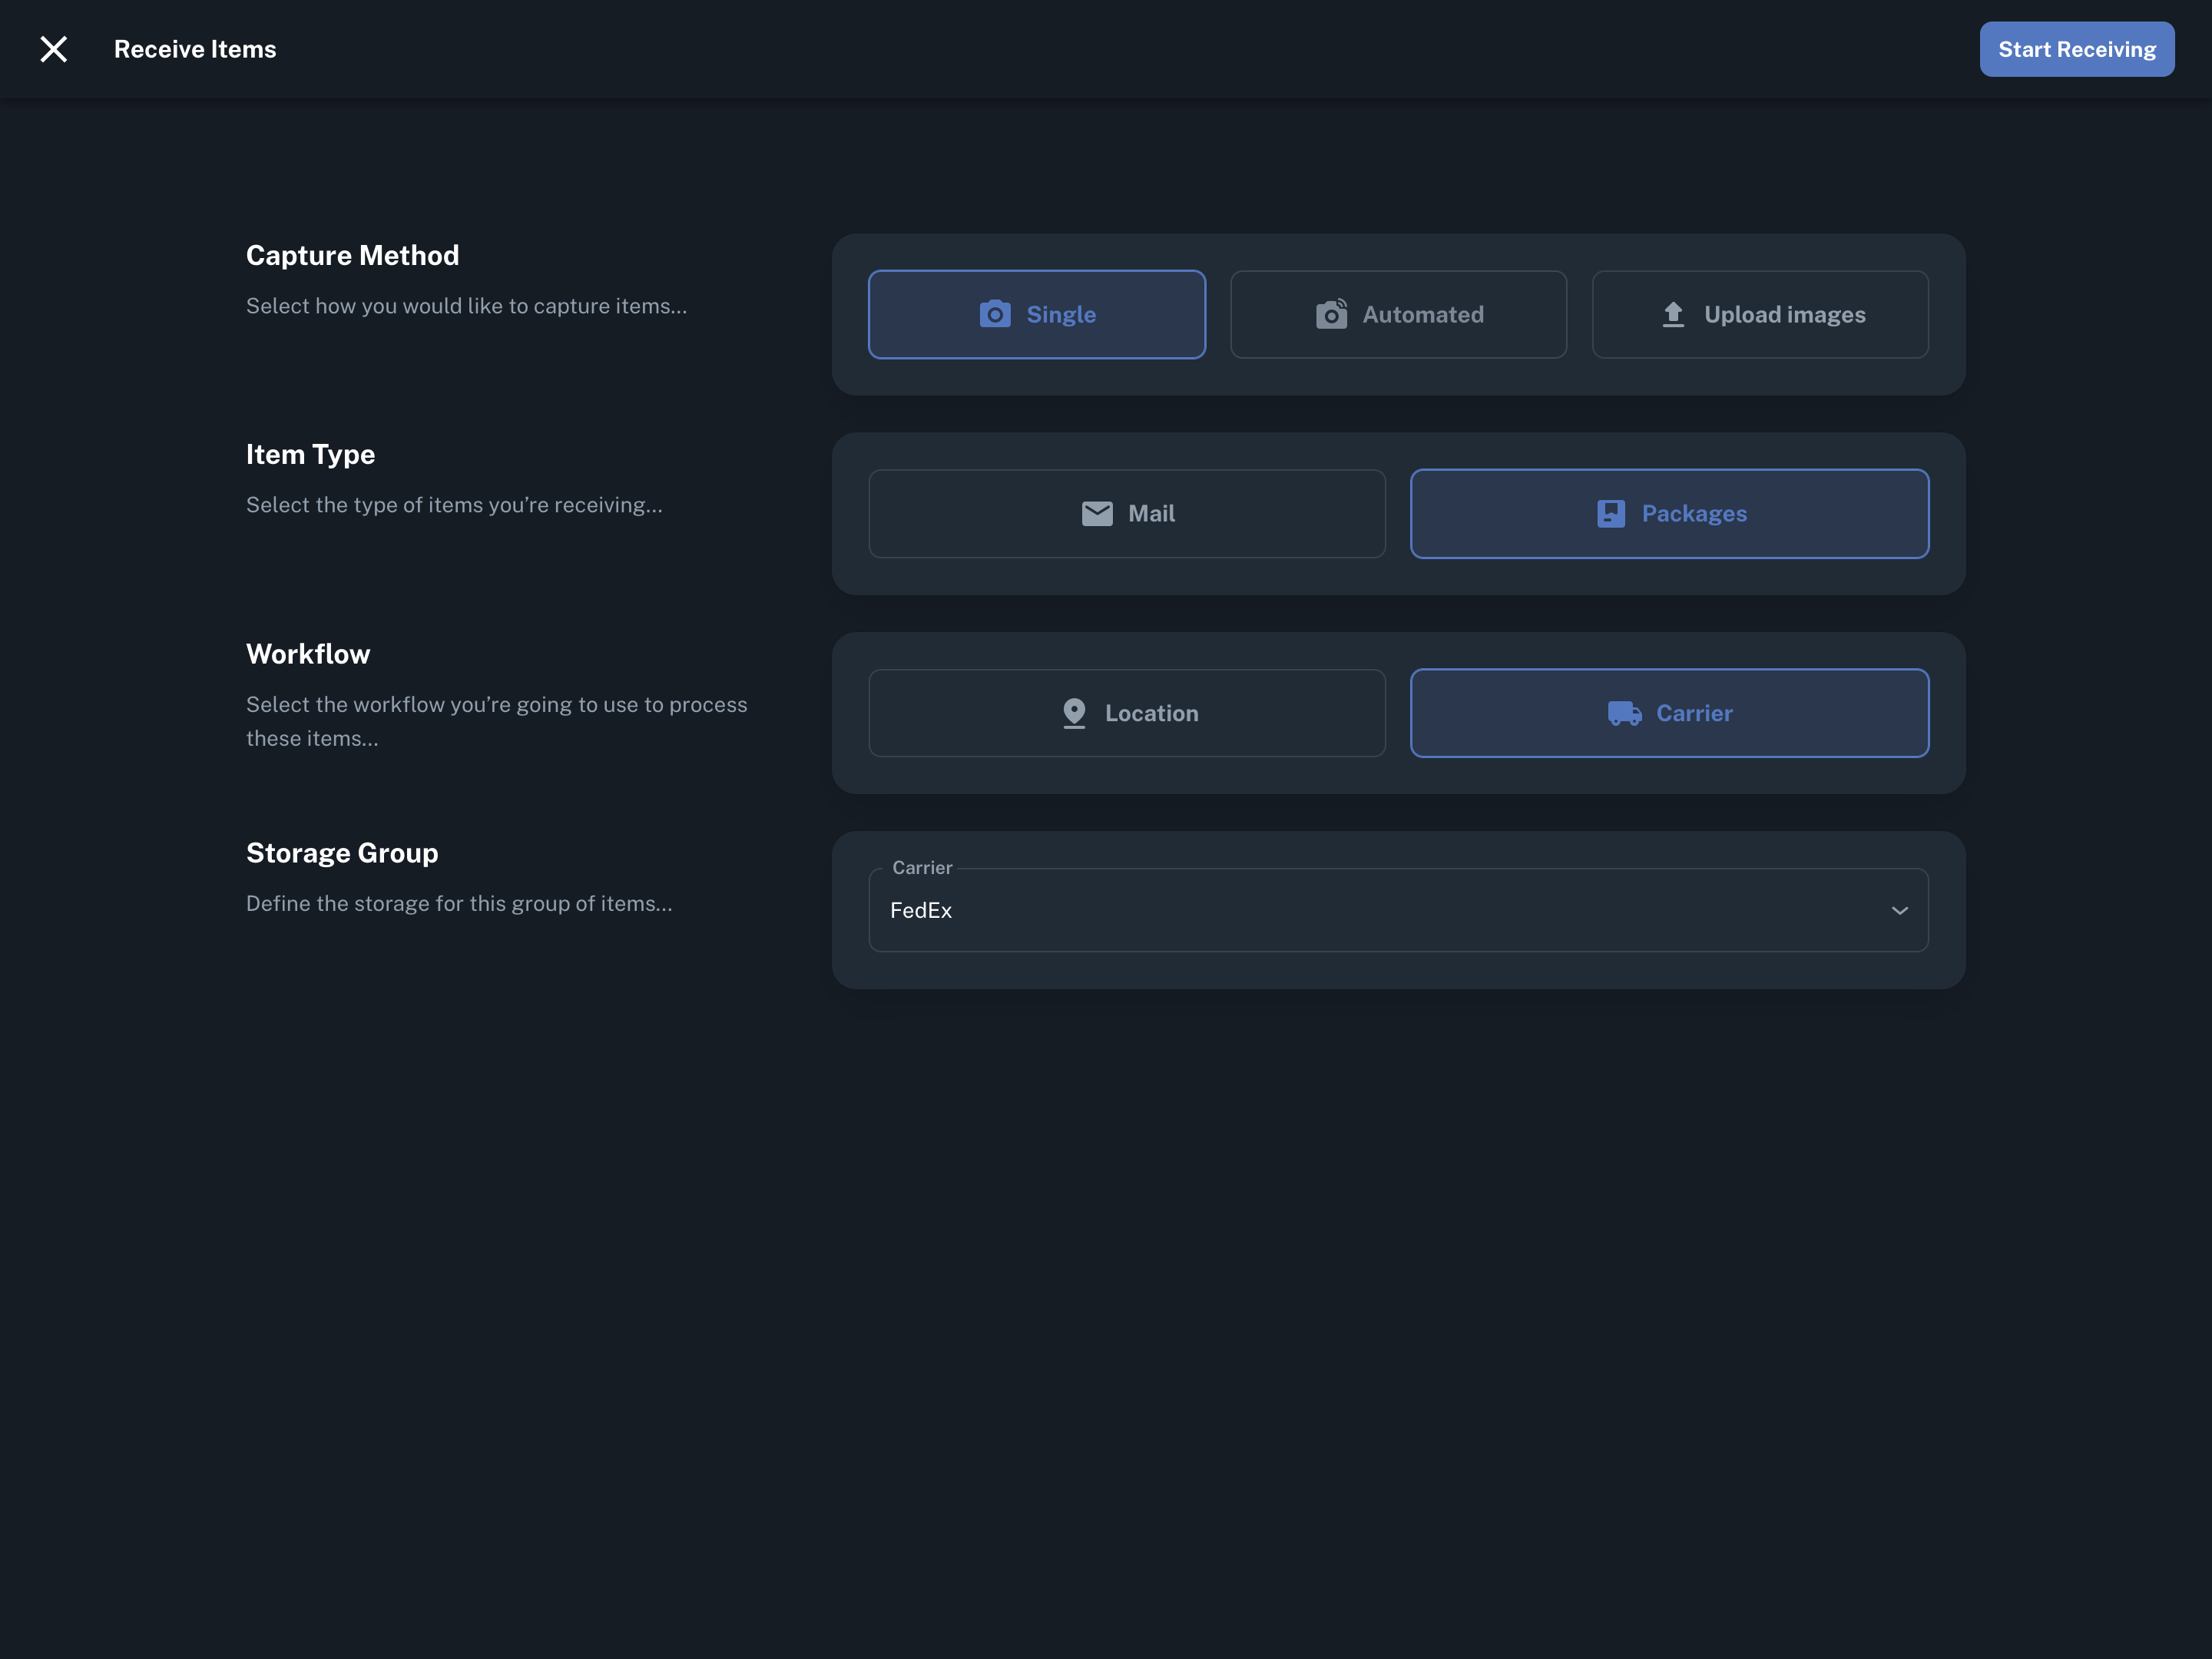
Carrier
With the carrier workflow, packages are grouped by carrier but can also be assigned a spot within that carrier group. This workflow works well for organizations that receive a relatively low volume of packages and want to keep them separated by carrier.
When the carrier workflow is selected, you’ll have the ability to select a carrier before you start receiving. You can choose from USPS, UPS, FedEx, Amazon, DHL, or Other.
As you’re receiving packages, you’ll have the option to enter a value for the exact spot the package is located. When packages are received with the carrier workflow, the Location ID for any given package will look something like this:
Carrier – FedEx (1)
In this example, FedEx was selected as the carrier, and “1” was entered as the spot, meaning this package is being stored with packages from FedEx and is located in spot 1.