When it comes to inbound mail and packages, we like to say the mailroom is responsible for items from receipt to recipient. In other words, from the moment an envelope or package is received by the mailroom to the moment it is given to the recipient, the mailroom is fully accountable for keeping track of the item.
The final step of this journey from receipt to recipient is one of great importance, because it marks the point in time at which the item is no longer the mailroom’s responsibility. When the item finally reaches the hands of the recipient, the mailroom has fulfilled its obligations and completed its services, and now, the recipient is responsible for their item.
So, it’s no wonder mailrooms wish to record this event with some method of formal proof that this exchange of custody took place. Fortunately, Received Digital was built to make this process as easy, secure, and seamless as possible for both mailroom operators and recipients, and in this article we’re going to explain how.
Two methods of proof
When the mailroom wants to capture proof that an item is being given to a recipient, usually one of two things is happening: the item is being delivered or picked up. Therefore, these are the instances where the mailroom has the ability to capture proof of transference to the recipient in Received Digital.
To do this, the mailroom can choose between two different methods. Keep reading to learn about each!
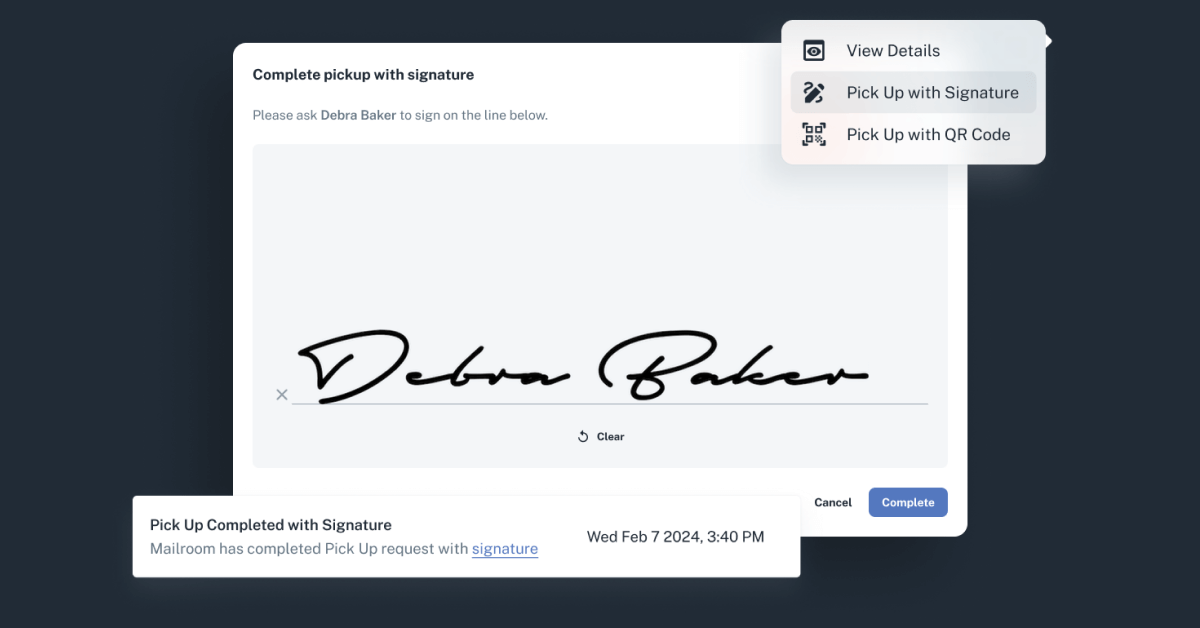
Signature
Choosing the signature method allows the mailroom operator to capture a digital signature from the recipient on a tablet or phone. It’s a classic, tried and true method of confirmation. Here’s what it looks like:
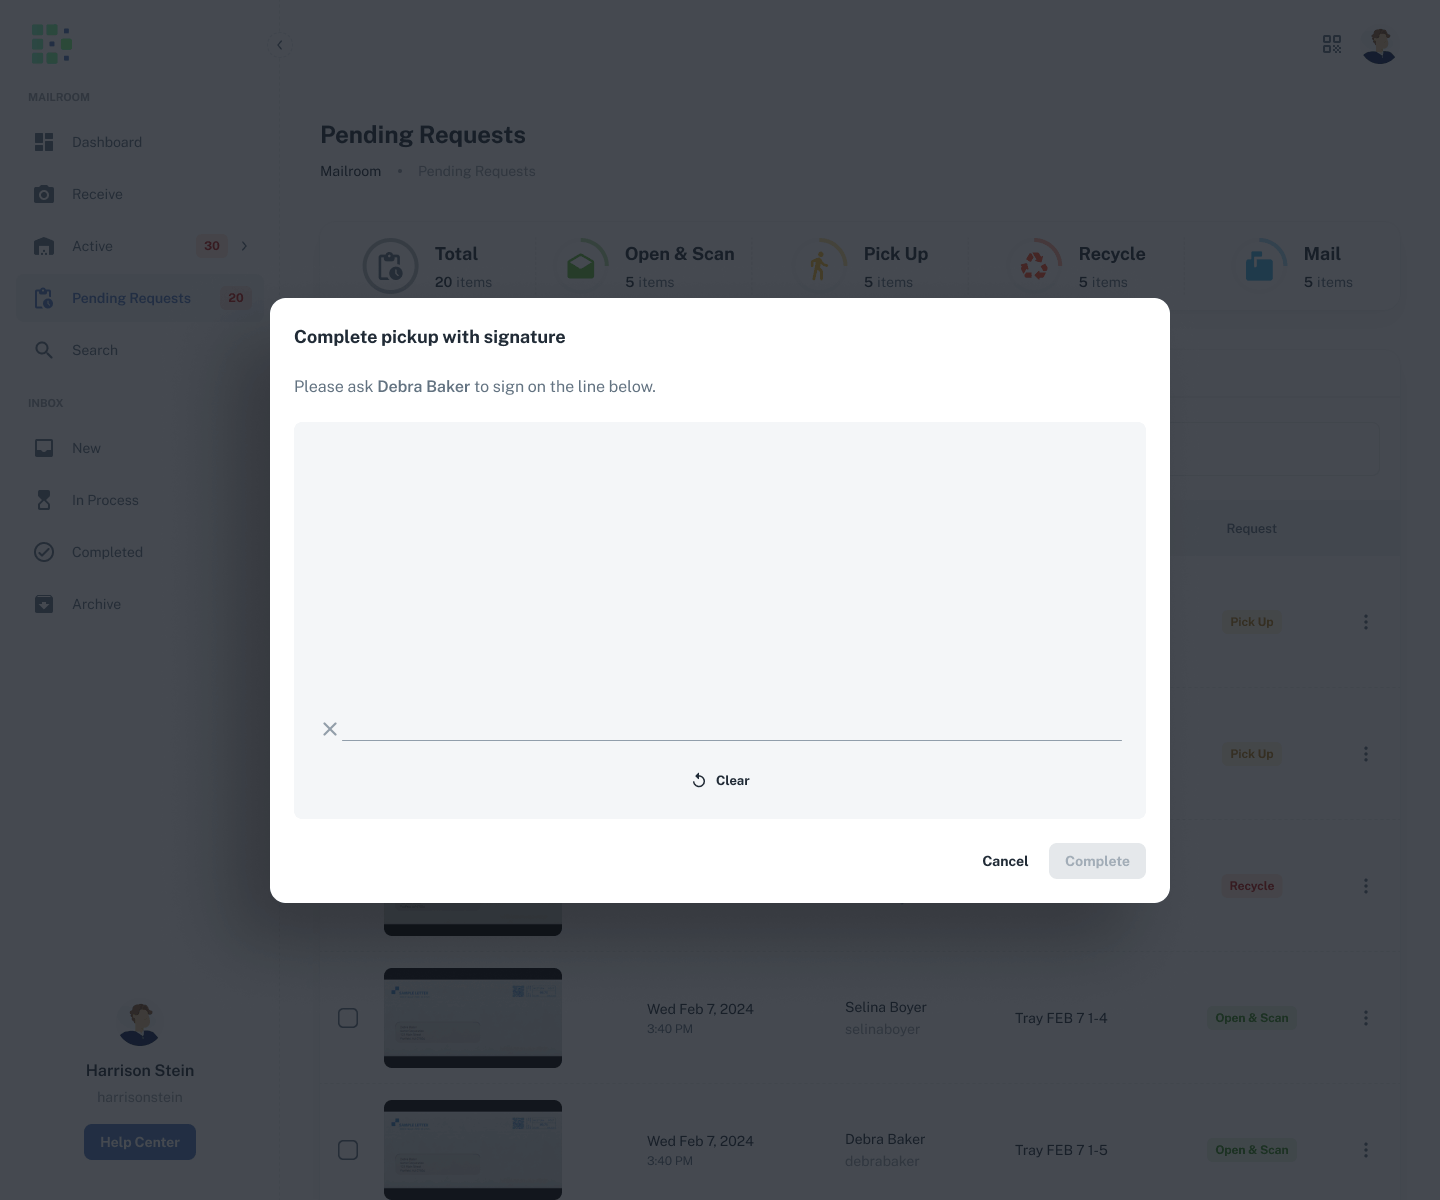
Just as you’d expect, the recipient is required to sign his or her name on the line, and upon completion, the signature is saved in Received Digital. If there is ever a dispute about the events that took place, the mailroom can easily retrieve the signature from the history section of the Item Details page.
QR code
The second method of capturing proof is a little less traditional, but equally as powerful and arguably even more secure and efficient for both the mailroom and the recipient. That is the QR code scan.
With this method, the mailroom operator is able to scan the recipient’s unique QR code using any device with a camera. Here’s what it looks like from the mailroom operator’s perspective:

The process is quite simple. The operator points the camera at the recipient’s device with his or her QR code open in Received Digital. As soon as the QR code is recognized, the confirmation is complete, and the event is recorded in the item’s history section.
So what makes this method more efficient and secure? Well, not only is it a completely touchless experience, it’s also a bit quicker than having the recipient sign their name. The real magic, though, is that the recipient’s QR code is completely unique to them. In order to access it, the recipient must be logged in to Received Digital with their username and password.
Not only that, the recipient’s QR code also changes every time it’s used. This makes it much more difficult to falsify proof of delivery or pickup, and that means the mailroom can be that much more certain the item is being handed off to the appropriate recipient.
Which one should I use?
While we like to recommend the QR code be used to maximize security and efficiency, we want you to use whichever method fits best into your mailroom’s workflow. After all, both methods exist because different situations might have different requirements.
For example, if a recipient doesn’t have their device at the time of pickup or delivery, the signature capture acts as a reliable backup method. Others might just prefer to capture signatures all the time simply because it’s more familiar and traditional.
In the end, both methods provide the mailroom with a secure confirmation of the exchange that’s stored safely in Received Digital.
How to capture proof of pickup and delivery
To start using these methods to capture proof of pickup and delivery from recipients, follow the steps below:
- Navigate to Mailroom in the left menu.
- Click on the Settings tab.
- Enable signature/QR code for pickup and/or delivery by toggling the switches to on.
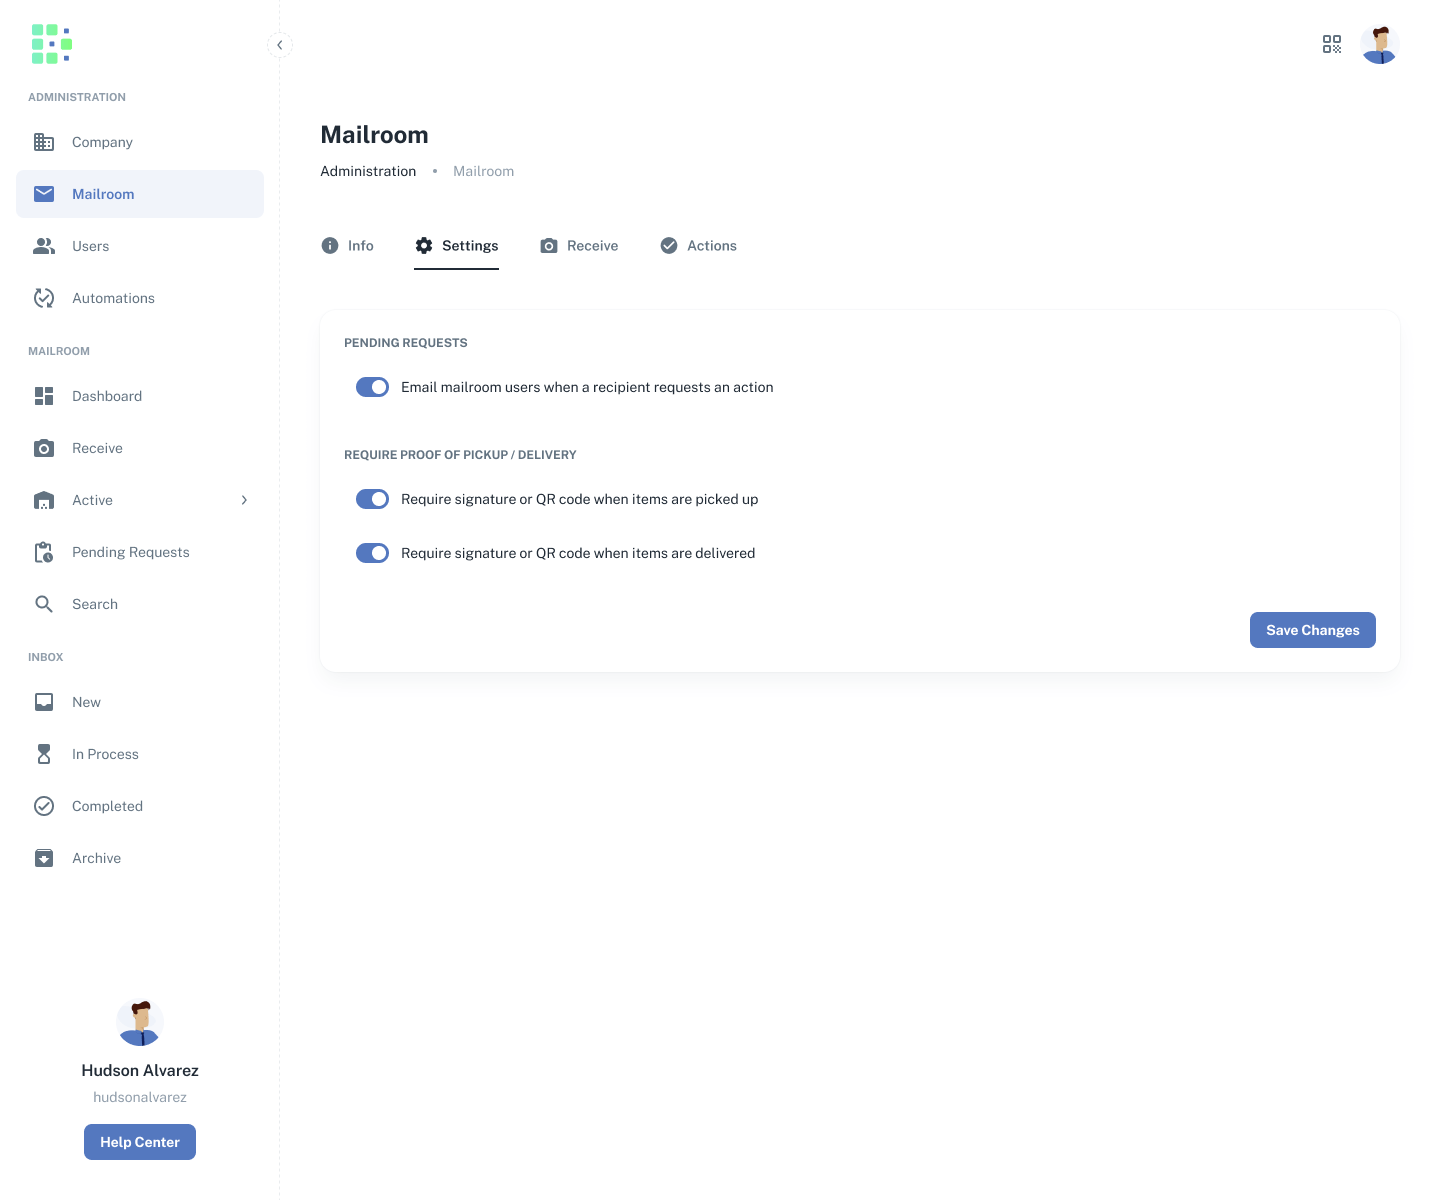
Now, next time you go to complete a Pick Up or Deliver request, you’ll see two options to complete the action: Signature and QR Code.